Construction: Day 2 of filming and editing
Today I set out to collect the rest of the filming I would need for the remainder of my music video, myself and the actor set a time in which we would go out and film, thankfully, the weather held up nicely and we were able to get the shots we needed. I spent around 2 hours filming as I took the time to get as many shots as possible which would help me with editing later on.
As I finished filming, I uploaded the clips to my computer and started the editing process all over again. Because I already created the template, color correction, composition settings etc for the opening 1:30 of my music video, I really didn't need to add much apart from the clips of course. Below are some images of me editing on Adobe After Effects:
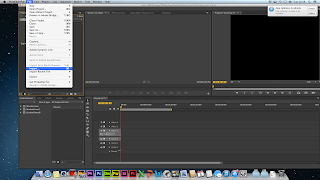
 The effect I wanted on some clips was the reverse effect, to create this, I clicked on the chosen effect, went to TIME then TIME REVERSE LAYER.

Next I wanted to play around with the colour corrections, as you can see the image is now black and white, to do this I clicked on the adjustment layer I created earlier, went to EFFECTS > COLOUR CORRECTIONS > HUE/SATURATION.

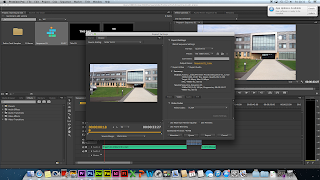
The next common process was to just add the clips in which I filmed earlier today, this was the simple 'drop and drag' process onto the timeline, I then would crop the clips to the appropriate size.
 To gain a final copy of my first draft I would have to add the footage to the render que, To do this, I went to FILE > EXPORT > ADD TO RENDER QUE. I then changed the file settings to H.324 and then add audio by ticking the 'Audio preferences'.
I have finally editing together a 'draft' final edit for my music video, the reason why it is a draft is because I would like some feedback given to me about whether or not it's good or if there is something I can change. You can watch my music video below:
As I finished filming, I uploaded the clips to my computer and started the editing process all over again. Because I already created the template, color correction, composition settings etc for the opening 1:30 of my music video, I really didn't need to add much apart from the clips of course. Below are some images of me editing on Adobe After Effects:
Next I wanted to play around with the colour corrections, as you can see the image is now black and white, to do this I clicked on the adjustment layer I created earlier, went to EFFECTS > COLOUR CORRECTIONS > HUE/SATURATION.
The next common process was to just add the clips in which I filmed earlier today, this was the simple 'drop and drag' process onto the timeline, I then would crop the clips to the appropriate size.
I have finally editing together a 'draft' final edit for my music video, the reason why it is a draft is because I would like some feedback given to me about whether or not it's good or if there is something I can change. You can watch my music video below:
Construction: Editing + Take two of opening
After watching back my first draft of the opening 1:30 of my music video, I decided to completely revamp the whole music video to make it look better, the first problem in which occured to me was the shakiness of the original footage, this made the video look incredibly weak and I knew that this could possibly knock marks off my final piece. I also made sure I had another go at lip syncing the correct lines as last time was a complete failure and made my music video laughable. During the editing process of the second take of the music video, I had used exactly the same features (anamorphic, color correction) to build the video together, below you are able to watch the first 1:30 of the second take of my music video:
Research: Audience feedback on practice shot
After creating an opening 1 minute practice of my music video I have collected audience feedback on what people think about the practice, this will help me determine the strengths and weaknesses of my practice clips and ultimately help me create a better final piece. Below are some of the comments in which i have collected from various different people.
The concept of the music video is interesting however a lot of the shots are shaky and will need to be stabilised.
I like the different shots throughout the music video however the miming to the lyrics are slightly off and would need to be changed.
The shots chosen in the woods are good and I like the colour correction however the some shots are out of focus and shaky meaning they will need to changed.
These comments I have collected help me give me an idea of how I can improve my music video, it also shows me the strengths in which i can either keep or redo to make it even better. I will take all of these comments on board so that I will get the best results.
Construction: Editing Day One
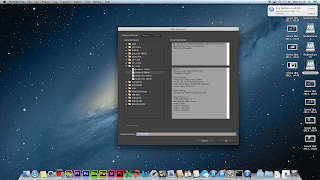
After I had captured the first section of my music video, I felt that in order to understand whether I had filmed the right clips, I would edit together a first draft together. The software I used to edit the draft together was Adobe After Effects, below I will leave some proof shots of me editing.
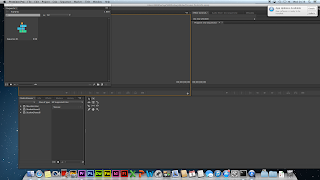
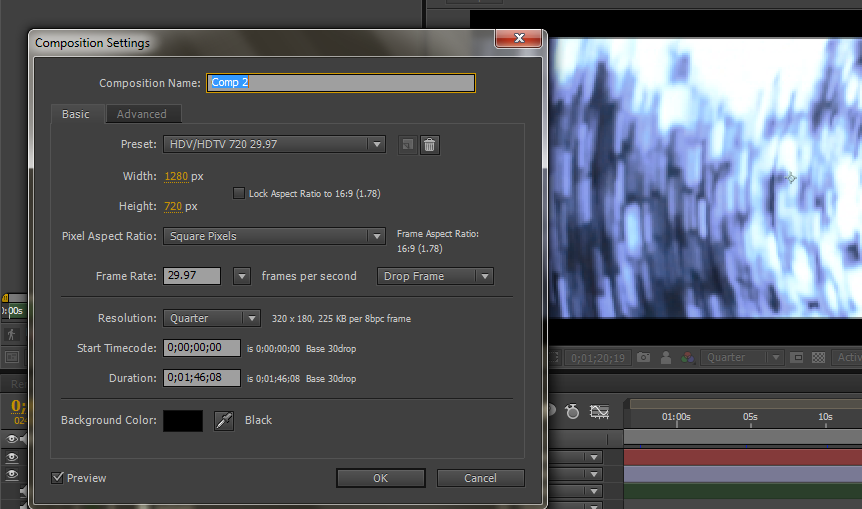 Here are the composition settings I have used for my music video, 1280x720 was the screen size in which I will be using meaning that my final project will be in HD.
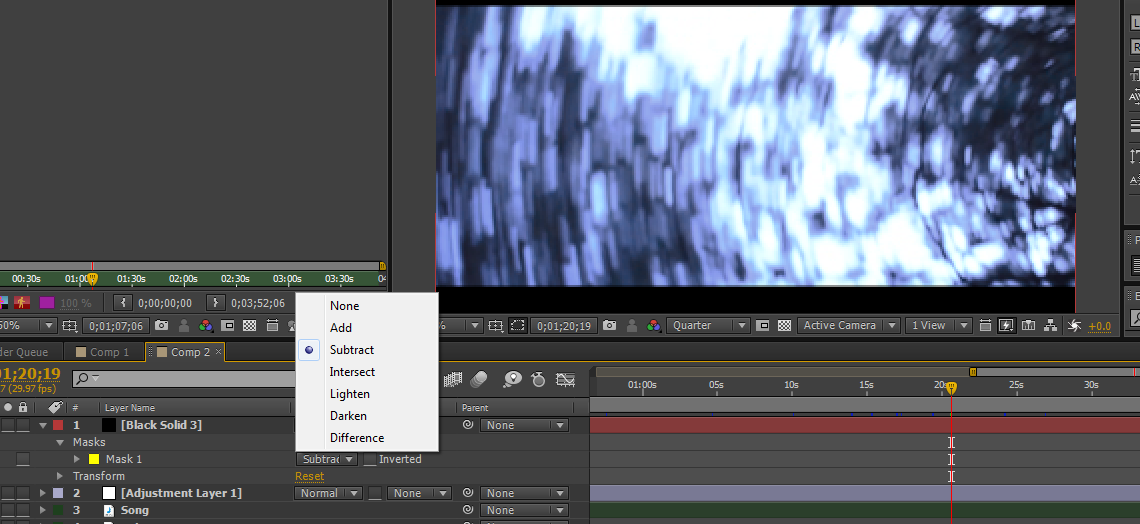
To get the anamorphic look in my music video, I created a black 'solid' layer, I then used the rectangle tool to create a suitable black rectangle over the video, I then changed the rectangles settings to 'subtract'.
 To not get confused when working on the work panel with all the different clips, I had collectively changed the color of the markings to helps identify the music, the introduction and the main music video.
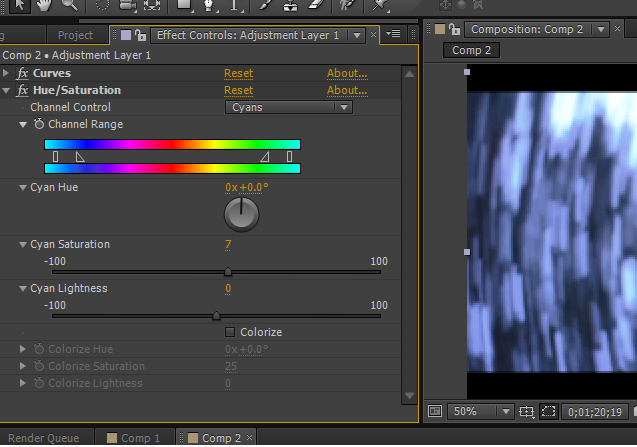
Although not complete, I added a basic color correction to the music video by creating an adjustment layer and adding curves and huw/saturation from the list of options, I made sure that the color green was slightly more noticeable and reduced the amount of blues.
I have rendered together a first draft of the opening 1:40 of my music video, make sure you also watch it in 720p for the best results!
Here are the composition settings I have used for my music video, 1280x720 was the screen size in which I will be using meaning that my final project will be in HD.To get the anamorphic look in my music video, I created a black 'solid' layer, I then used the rectangle tool to create a suitable black rectangle over the video, I then changed the rectangles settings to 'subtract'.
Although not complete, I added a basic color correction to the music video by creating an adjustment layer and adding curves and huw/saturation from the list of options, I made sure that the color green was slightly more noticeable and reduced the amount of blues.
I have rendered together a first draft of the opening 1:40 of my music video, make sure you also watch it in 720p for the best results!
Construction: Day One Of Filming

At 4pm, I was also aware that sunset would be occurring soon which meant that lighting could be affected, this meant I could only film a certain amount of the music video. Thankfully, I knew what I was doing as I had thoroughly prepared the sequence of shooting, this meant that filming time was significantly shortened but I still did not get all the footage I needed.
In order to complete my music video, I will need another day of shooting in similar conditions. I will need to take note of the weather and also the characters costume and appearance so it perfectly blends.
Research: Playing with the Nikon D3200
Today is the first day in which I can spend time taking clips with the camera which I will use for my music video, I felt to get to grips with the camera I should spend some time researching the different aspects of the camera and coming to terms with the software in which I will use to edit and render. Below is a little video I made showing the capabilities of the camera, you may also notice that I have cropped the height of the video to make it look more cinematic and have also used a color correction.
I also wanted to test out one of the movements in which I will use in my music video, the movement is called a 'camera swipe' and makes the camera seem as if it is swiping to another location. Below is my short attempt at the effect.
I also wanted to test out one of the movements in which I will use in my music video, the movement is called a 'camera swipe' and makes the camera seem as if it is swiping to another location. Below is my short attempt at the effect.
Research: In-depth look into the Nikon D3200
In order to capture the best shots for my music video, I will need to get to grips with the camera I will be using for my project, the camera I will be using is the Nikon D3200. I will need to learn the different interesting aspects in which the camera is capable of creating, so I have made this post for revision and also future reference when using the camera.
Changing the aperture:
Changing the aperture will be an important skill in which I would need to learn, this is because it helps create a stronger depth of field for various shots. I have found a video in which shows how to change the aperture on the D3200.
Below is an extract I found from here describing how to control the depth of field usng aperture:
Although a lens can only bring objects at a single distance from the camera into critically sharp focus, other parts of the scene in front of and behind the most sharply focused plane appear acceptably sharp. The area in which everything looks sharp is called depth of field. Objects within the depth of field become less and less sharp the farther they are from the plane of critical focus. As the distance increases, things eventually become so out of focus that they no longer appear sharp at all. The near and far edges of your depth of field are usually not visible as exactly defined boundaries. Instead, sharp areas imperceptibly merge into unsharp ones. At normal shooting distances, about one-third of the depth of field is in front of the plane of critical focus (toward the camera), and two-thirds is behind it (away from the camera). When the camera is focused very close to an object, the depth of field becomes more evenly divided.
To see the depth of field on an SLR-type camera, you press a depth of field preview button that stops down the aperture to the one that will be used to take the photo. On point and shoot digital cameras, the best way to check depth of field is to take a trial picture and then play it back on the monitor where most cameras will let you zoom it and then scroll around it to examine details.
Often it doesn't matter so much exactly what you are focused on. What does matter is whether or not all of the objects you want to be sharp are within the available depth of field so they appear sharp. There are reasons you may want parts sharp or not. You may want only a part of the setup in sharp focus to give it emphasis against a softer foreground or background. On the other hand you may want everything sharp to show details. To control how deep or shallow depth of field is, you have three factors to work with.
How to do it: NOTE; It can't be adjusted in live view mode. To adjust the aperture exit the live view mode on hold down the exposure compensation button, which looks like +/- at the top-right of the camera. Then turn the adjustment wheel situated below.
Movie mode settings:
The movie mode setting gives the user a variety of settings which could help them whilst recording, for example a view which shows you sound levels and where the film will be cropped. More importantly there is an option which gives you a range finder. You can change the movie settings by pressing the 'info' button at the top of the camera.
Changing image quality:
Press the info button to the left of the screen, you can browse through a variety of settings but 'qaulity' is located at the top of the list. In order to gain the best shots you must change the quality settings to 'raw'.
Future referencing
Before I go out and start filming I will make sure I watch the video situated below in order to revise all the different buttons and options the D3200 has to offer:
Changing the aperture:
Changing the aperture will be an important skill in which I would need to learn, this is because it helps create a stronger depth of field for various shots. I have found a video in which shows how to change the aperture on the D3200.
Below is an extract I found from here describing how to control the depth of field usng aperture:
Although a lens can only bring objects at a single distance from the camera into critically sharp focus, other parts of the scene in front of and behind the most sharply focused plane appear acceptably sharp. The area in which everything looks sharp is called depth of field. Objects within the depth of field become less and less sharp the farther they are from the plane of critical focus. As the distance increases, things eventually become so out of focus that they no longer appear sharp at all. The near and far edges of your depth of field are usually not visible as exactly defined boundaries. Instead, sharp areas imperceptibly merge into unsharp ones. At normal shooting distances, about one-third of the depth of field is in front of the plane of critical focus (toward the camera), and two-thirds is behind it (away from the camera). When the camera is focused very close to an object, the depth of field becomes more evenly divided.
To see the depth of field on an SLR-type camera, you press a depth of field preview button that stops down the aperture to the one that will be used to take the photo. On point and shoot digital cameras, the best way to check depth of field is to take a trial picture and then play it back on the monitor where most cameras will let you zoom it and then scroll around it to examine details.
Often it doesn't matter so much exactly what you are focused on. What does matter is whether or not all of the objects you want to be sharp are within the available depth of field so they appear sharp. There are reasons you may want parts sharp or not. You may want only a part of the setup in sharp focus to give it emphasis against a softer foreground or background. On the other hand you may want everything sharp to show details. To control how deep or shallow depth of field is, you have three factors to work with.
- Aperture size. The smaller the size of the lens aperture (the larger the f-number), the greater the depth of field. The larger the aperture, the shallower the depth of field.
- Camera-to-subject distance. As you move father from the subject you are focused on, you increase depth of field. As you move closer, you decrease it.
- Lens focal length. Zooming out to a wider angle of view increases depth of field. Zooming in decreases it.
How to do it: NOTE; It can't be adjusted in live view mode. To adjust the aperture exit the live view mode on hold down the exposure compensation button, which looks like +/- at the top-right of the camera. Then turn the adjustment wheel situated below.
Movie mode settings:
The movie mode setting gives the user a variety of settings which could help them whilst recording, for example a view which shows you sound levels and where the film will be cropped. More importantly there is an option which gives you a range finder. You can change the movie settings by pressing the 'info' button at the top of the camera.
Changing image quality:
Press the info button to the left of the screen, you can browse through a variety of settings but 'qaulity' is located at the top of the list. In order to gain the best shots you must change the quality settings to 'raw'.
Future referencing
Before I go out and start filming I will make sure I watch the video situated below in order to revise all the different buttons and options the D3200 has to offer:
Editing: Changing editing software
Adobe After Effects gives me a series of more options in which i cannot use in Premiere Pro, these options gives me more of a variety when coming to edit. i also know a vast amount regarding the software which will help me to edit and navigate around the software which will hopefully produce a more satisfying editing experience.
Planning: Chosen film date & details
in order to chosen a certain date which will benefit myself and the filming schedule I need to figure out various different events which could hinder or will benefit my schedule, below is a list of what i need to know before I choose a date for filming:

Location
- Whether the cast is eligible to participate on the chosen date.
- The weather on the chosen date
- Location is eligible to use on chosen date.
- Equipment can be rented for chosen date.
I have chosen the date 1st or 2nd February for the proposed date I wish to film, in order to film on this date I must again go through the options I listed above to see if it's possible.
Cast
I have had the confirmation that the cast member which will feature within my music video is able to participate within the filming on the 1st February, this means that I wouldn't need to change the date due to the casting not being able to make it.
Predicted weather
For my music video I need the day to be sunny, if it was cloudy or raining then it would ruin the slight exposure I wish within my shots, below is a predicted weather forecast for the day.
As you can see there is predicted all different types of weather throughout the 1st February, I could take the chance of filming on that day as there is a chance of sunshine however it seems that the 2nd February could be a better day to film.
Location
As I have knew throughout planning my location, i was able to use my locations any time, throughout any day of the week as it's open to the public. This means that the location will not interfere with the date I film.
Equipment
The most important part of the planning process would be whether I am able to book out all of the equipment I need for the filming process.
Target for next week
Below is a list of what I shall have done by next tuesday;
-Change order of posts (casting should be lower down)
-Choose date for start of filming, decide with cast
- Find the date when I can rent out equipment
-Change order of posts (casting should be lower down)
-Choose date for start of filming, decide with cast
- Find the date when I can rent out equipment
Planning: Typography for music video
Today I was practicing the art of typography on Adobe After Affects. I had the idea of adding typography at the beginning of my music video when I was watching other professional music videos. The introduction would usually add the use of typography to introduce the artist or song name, this is what I intend on doing.
Below is the short video I made demonstrating my skills of typography.
Below is the short video I made demonstrating my skills of typography.
Planning: Shot list
In order to make sure that filming is followed by previous construction, I have put together a shot list for all the different shots I will be using throughout the music video. I have also added a key to remind me of all the possible shots I am able to use.
Key:
Establishing shot - ES
Mid shot - MS
Over the shoulder - OTS
Close up - CU
Two Shot - TS
Extreme close up - ECU
Long Shot - LS
Noddy shot - NS
Cut-in shot - CiS
Cut-out shot - CoS
(reverse) - clip will be reversed when edited.
Shot 1: ECU of face. (reversed)
Shot 2: MS of face and shoulders (reversed)
Shot 3: LS of character standing up. (reversed)
Shot 4: CiS of characters footsteps. (reversed)
Shot 5: CU of character dropping object (reversed)
Shot 6: MS of character walking away (reversed)
Shot 7: MS of character walking out of door (reversed)
Shot 8: ECU of face
Shot 9: MS of face and shoulders
Shot 10: LS of character standing up
Shot 11: CU of characters smiling
Shot 12: CoS of blackness/character now in the forest
Shot 13: MS of character looking around
Shot 14: CoS character now running around surprised
Character miming
Shot 15: MS of character attempting to climb tree
Character miming
Shot 16: LS of character running again
Character miming
Shot 17: MS of character out of breath
Shot 18: POV of character looking at hands
Shot 19: MS of character smiling
Shot 20: CoS of character using hands to swipe camera, moves to another field.
Shot 21: ELS of character standing in open field
Shot 22: CU of character looking at hands
Shot 23: CoS of character running happily
Shot 24: MS as character stops still, swipes hands accross camera
Shot 25: CoS of character changing location to street
Character miming
Shot 26: LS of character standing in the middle of the street
Shot 27: CoS of character changing location back to orginal forest
Shot 28: MS of character standing confused
Shot 29: CU side of characters face
Shot 30: LS character sitting down
Shot 31: LS character walking around
Shot 32: CoS Swipes camera again, another location
Shot 33: Character plays around
Character miming
Shot 34: Character swipes camera back to original location
Shot 35: MS of character staring into camera
Shot 36: LS of character walking back to opening scene
Shot 37: ELS of character lying back down on the ground
Shot 38: ECU of characters face whilst lying down
Shot 39: Fading into darkness
Key:
Establishing shot - ES
 |
| Close up shot |
Over the shoulder - OTS
Close up - CU
Two Shot - TS
Extreme close up - ECU
Long Shot - LS
Noddy shot - NS
Cut-in shot - CiS
Cut-out shot - CoS
(reverse) - clip will be reversed when edited.
 |
| Long shot |
Shot 2: MS of face and shoulders (reversed)
Shot 3: LS of character standing up. (reversed)
Shot 4: CiS of characters footsteps. (reversed)
Shot 5: CU of character dropping object (reversed)
Shot 6: MS of character walking away (reversed)
Shot 7: MS of character walking out of door (reversed)
Shot 8: ECU of face
Shot 9: MS of face and shoulders
Shot 10: LS of character standing up
Shot 11: CU of characters smiling
Shot 12: CoS of blackness/character now in the forest
Shot 13: MS of character looking around
 |
| Extreme long shot |
Character miming
Shot 15: MS of character attempting to climb tree
Character miming
Shot 16: LS of character running again
Character miming
Shot 17: MS of character out of breath
Shot 18: POV of character looking at hands
Shot 19: MS of character smiling
Shot 20: CoS of character using hands to swipe camera, moves to another field.
| Extreme close up shot |
Shot 22: CU of character looking at hands
Shot 23: CoS of character running happily
Shot 24: MS as character stops still, swipes hands accross camera
Shot 25: CoS of character changing location to street
Character miming
Shot 26: LS of character standing in the middle of the street
Shot 27: CoS of character changing location back to orginal forest
Shot 28: MS of character standing confused
Shot 29: CU side of characters face
Shot 30: LS character sitting down
Shot 31: LS character walking around
Shot 32: CoS Swipes camera again, another location
 |
| Establishing shot |
Character miming
Shot 34: Character swipes camera back to original location
Shot 35: MS of character staring into camera
Shot 36: LS of character walking back to opening scene
Shot 37: ELS of character lying back down on the ground
Shot 38: ECU of characters face whilst lying down
Shot 39: Fading into darkness
Planning: Equipment planning
To make my music video look as professional as possible, I will need to be equipped with some great tech in order to pull it off. Below are some of the equipment I have planned to use for my music video:
HD Quality camera
I have planned to use a good quality camera to film my music video, however I have not specifically chosen chose the model of the HD camera yet. I need the camera to be a top quality model so that I can get some great shots which make the music video look less of a home movie and more of a professional music video, I hope that the camera gives me crisp looking shots and other factors such as focus and exposure lock.
Below are some camera's which will give me quality results:
- Panasonic HC-V700
- Canon Vixia HF R300
- Panasonic HC-V720
- JVC Everio GZ-VX815
- Canon Legria HF R48
- Canon XA10
CHOSEN CAMERA
 The camera I have chosen to use is a Nikon D3200, this is due to a range of factors, for example the camera can be accessed from the media department of my school. It is also a good quality camera as i have watched previous quality tests of the camera. Below is me experimenting with the D3200…
I experimented with the depth of field of the camera. For example in this picture you can see that you person is in focus whilst the background is slightly blurred out. This shot shows the quality that the camera works at.
 Again this shows the different qualities of the depth of field, it also shows the quality of shots the camera is able to produce. This makes me confident that when i come to taking pictures for my digipack, i will get some really good clips.
This was my first time using the Nikon to film, although it doesn't look great it was because I was just playing around with the different effects, I am hopeful that the quality of the camera will give me the best results when filming my music video.
Steadicam
 A steadicam is a piece of equipment which uses physics to balance out the proportions of the camera so that when filming, the camera doesn't shake and cause bad footage. The reason I want to use a steadicam is quite simple really, it will give me great, professional shots and prevents the camera from shaking when I'm walking/moving the camera. I am able to borrow this piece of equipment from the media department which gives me an advantage as I won't have to look into renting one.
Tripod
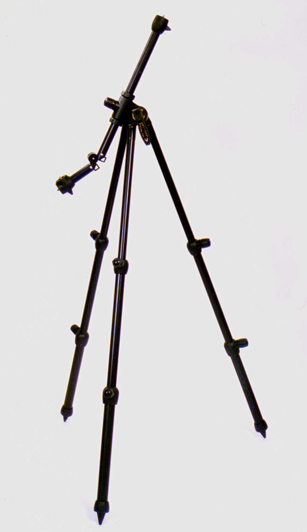 Again a tripod is another piece of equipment which is incredibly important to enhance the quality of my filming, this is because it prevents the cameraman from holding the camera all the time which could cause the image to shake, instead the tripod allows the camera to sit on top of it and gives you the opportunity to move it sideways, upwards and downwards. I am able to borrow this from the media department meaning I don't need to look to rent one out. I have also had previous experience with using a tripod so I know how to use it efficiently.
HD Quality camera
I have planned to use a good quality camera to film my music video, however I have not specifically chosen chose the model of the HD camera yet. I need the camera to be a top quality model so that I can get some great shots which make the music video look less of a home movie and more of a professional music video, I hope that the camera gives me crisp looking shots and other factors such as focus and exposure lock.
Below are some camera's which will give me quality results:
- Panasonic HC-V700
- Canon Vixia HF R300
- Panasonic HC-V720
- JVC Everio GZ-VX815
- Canon Legria HF R48
- Canon XA10
CHOSEN CAMERA
 The camera I have chosen to use is a Nikon D3200, this is due to a range of factors, for example the camera can be accessed from the media department of my school. It is also a good quality camera as i have watched previous quality tests of the camera. Below is me experimenting with the D3200…
I experimented with the depth of field of the camera. For example in this picture you can see that you person is in focus whilst the background is slightly blurred out. This shot shows the quality that the camera works at.


This was my first time using the Nikon to film, although it doesn't look great it was because I was just playing around with the different effects, I am hopeful that the quality of the camera will give me the best results when filming my music video.
Steadicam

Tripod
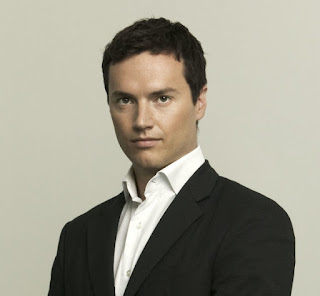
Planning: Casting for music video
 To be able to make sure that i get the best grades for my music video, not only do i have to plan all the different camera aspects such as shots and movements, I have to make sure that I have a good casting which will guide my music video to a higher grade. If i didn't have a good cast then my music video will look poor quality and roughly planned so planning who will screen in my music video is incredibly important.
I have lined up 3 different characters which will battle for the place in acting in my music video. Below are the 3 individuals I have planned to contend to play the only part in my music video.
Jordan Bignell
I have had previous experience with working with Jordan from last years coursework piece where i had to make a horror intro. Through this work i had understood that Jordan is able to sufficiently act and show emotion and expression which was needed. I have chosen Jordan for my music video because of these attributes and we also are friends meaning communicating and working with each other will be much easier.
Deet Bains
Again, myself and Deet were partners in last years media coursework where we spent every lesson working with each other planning our horror film intro. i know that Deet is keen in acting and the different aspects of media studies so I had asked him whether he was eligible to act and he had agreed. Deet however doesn't have any acting experience meaning I may have to consider whether he'll play the character.
Taylor Wilson
Taylor currently studies A Level Drama which could be a bonus to my music video. Taylor is the only act out of the 3 chosen that actually study Drama which makes him stand out from over the rest. However I have not yet been able to work with Taylor and I understand that some days he may find difficult to be able to film.
Final verdict
The character I have chosen to cast in my music video is Jordan Bignell. What made him stand out from the rest was our experience with working with each other, because of this bond, I understand his strengths and weaknesses which will make it much easier to film. I also understand his ability in acting and I'm sure that this can only benefit my music video grade.
Planning: Costume planning
Below is a power point I have made to show my planning I have done for what costume the character will wear in my music video, to make it clear there is only 1 character casted for my music video meaning the costume I have chosen is for him and not for anyone else.
Planning: Location planning for music video
In order for my music video to look great, I need to pick the right location which will give me the best results. Throughout the selection phase I have picked my locations carefully, I made sure they had the following:


A tendency to be bright & colorful
The reason why I need my location to be bright and colorful is so it will look good when coming to edit the clips together, I will be using a dim color correction on my work to make it look more professional so all the colors which don't stand out will look poor in the final edit, this is why I need the colors in my environment to be bright.
An open area (also for public use)
I will need an open area so it makes filming much easier, if I was to film in a small, cramped location then filming will become difficult which in effect will also make the quality of the filming poor. The location will also need to be for the public as these public locations would usually be easy to navigate to, also I don't want to be in trouble with the law if I was to trespass on non-public ground.
A natural environment
I want my locations to be as natural as possible because it will fit perfectly with the plot I have chosen which is that the guy is experiencing new and untouched locations. Also I am really intrigued to be shooting in an natural environment because I have seen previously how well nature looks through film and how well it can be portrayed through great editing. This is what I want to achieve.
Can easily navigate to
I need a location which can I can get to without any means of transport as this makes filming time much more flexible and also doesn't end to be a long trek whilst carrying props and filming equipment.
LOCATION 1: Kettering Quarry
Why? = The reason why I have chosen to film here is because it ticks all the boxes above, as I live close to the location it is just a few minutes walk from my house meaning I don't have to trek miles, I also have great knowledge of the place as I walk my dog around there. The location is also very natural and is filled with trees and open fields, this will make for a great place to film as I am able to use these green colors and make them stand out in the final edit. I have seen the quarry to be always very bright and colorful and new especially with autumn arriving the leaves on the trees will be turning yellow which will make the scenery much more colorful.
When? = This location will be used mostly throughout the whole of the music video, however because of the sheer size of the location, there are various different places I am intending to film.

LOCATION 2: Open Field, near school & allotment

Why? = An open field is what I need for the opening and the ending of the novel, it will be used to represent the freedom of the main character and because of how huge the field is, I believe that this is the perfect way to represent that. It is close to my home and also close to school meaning I can easily reach there within 10 minutes, it is also a natural environment which helps to reiterate my desire to use only natural locations in my music video.
When? I am only planning on using this location at the start and end of my music video.
Editing: Using and editing green screen footage
Today we learnt the skill of being able to use a green screen, not only that we were taught how to also edit the green screen clips and edit them to look professional and awesome. Firstly we were given a tutorial of all the different lighting uses with a green screen, we were also given a warning about how the creases of the green screen could effect the quality of the final edit. We were then given 2 clips, one of Mr Henton talking infront of the green screen and secondly a video of Adele's music video 'Rolling In The Deep'. We were told to open APP and were given the tutorial on how to use the master key, cropping the green screen video and how to make the video smaller to look more professional. Below is my final edit showing that I am capable of using a green screen...
I was then given the challenge to use some green screen clips previously filmed of a girl miming to the song from Adele 'Rolling In The Deep', we were then given the actual music video. Below is my final edit in which i used Adobe Premiere Pro, what i chose to do was to mix up the actual music music video and then put in the green screen footage in parts where the lip-syncing matched, below you can see a 40 second section of my final edit.
What have I learnt from this experience?
I have learnt clearly how to film using a green screen, how different light can affect and contribute to the final look of the clips, also how creasing of the green screen can cause major disadvantages to the final product. I had also learnt how to edit these clips using Adobe Premiere Pro, we were taught how to use the Master Key which is an effective tool to use when coming to work with green screens.
What will I take out from this experience?
From this experience of learning how to use green screen footage I will be able to consider whether I can use it in my music video. Now that I have the experience and knowledge of being able to use a green screen this gives me an advantage to whether I use it or not.
Editing: Adobe Premiere Pro Music Video Editing Challenge
Today I was set a challenge to see whether I can create a music video using clips which has been previously used in a music video by an artist called 'Macklemore'. During the task we were not aloud to watch the acutal music video so we didn't have an idea on what it actually looked like, instead we would have to use our imagination to create a music video.
We would use Adobe Premiere Pro to edit the clips together so it helped us improve our skills on the software. The skills we would use especially for this task would be to use transitions, how to grab particular footage and put it onto the timeline and alsov how to crop clips.
Below is my final edit using the clips given to me to create the music video, although I had created a longer video I only used 30 seconds worth of video to show what I believe was the best part I edited together.
As you can see this was a rough idea I had to put together these clips so that it would form some sort of story, looking at the original video I can see that they were completely different to one another meaning I had successfully edited the music video without copying the original. Below is the original music video and feel free to see the comparisons between them.
Research: Adobe TV
Now I have learnt the basics on how to use Adobe Premiere Pro I want to improve my knowledge of the software in order to get the best results when coming to edit my music video together.
 Adobe TV is filled with loads of videos and tutorials dedicated on showing how to perform different techniques which will look good on APP. The first thing I went to watch on the website was to watch the basic tutorials on how to do such things as editing and transitioning which refreshed my memory and I now know how to perform such tasks without needing help.
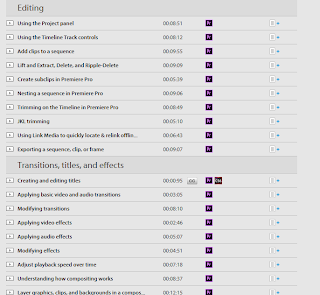
As you can see from the picture on the right it shows the different tutorials which you can pick from on the website, I chose to watch the clips from the editing tab and also the transition, titles and effects tab.
I hope to use Adobe TV in the future once I have filmed all of my music video. The videos will help me with understanding all diffferent types of tips, techniques and general knowledge I will need to progress into making a quality music video.
 Adobe TV is filled with loads of videos and tutorials dedicated on showing how to perform different techniques which will look good on APP. The first thing I went to watch on the website was to watch the basic tutorials on how to do such things as editing and transitioning which refreshed my memory and I now know how to perform such tasks without needing help.
 As you can see from the picture on the right it shows the different tutorials which you can pick from on the website, I chose to watch the clips from the editing tab and also the transition, titles and effects tab.
I hope to use Adobe TV in the future once I have filmed all of my music video. The videos will help me with understanding all diffferent types of tips, techniques and general knowledge I will need to progress into making a quality music video.
Editing: Learning to edit with Premiere Pro
Today I have been learning how to edit a short video using a software called Adobe Premiere Pro, in this blog post I will be going the step-to-step process I went through in order to edit a short video.
SETTING UP AN APP PROJECT
The first thing you need to do before you start editing is creating a project which will give you the basics in order to edit, I followed these steps in order to create a APP project:

1. Open Adobe Premiere Pro
2. Click on 'Create New Project'
3. You can change the location in which the project will be found in by changing the location drop down arrow, you can also name your project, once you are happy then you can continue.
4. You can also change the projects presets through this next stage, I do not need to so I will just continue
5. You have now finished creating a new project, you now have the tools to be able to start importing and editing video clips.
IMPORTING FILES TO APP
 To be able to start editing video clips you need to firstly import them onto your APP, to do this you have to go:
File > Import.. > Choose the video clips you wish to import.
CONSTRUCTING A PROJECT USING THROUGH THE USE OF 'MARK IN' AND 'MARK OUT' TO SELECT FOOTAGE
 To be able to select certain points of your footage which you need in your video, you will need to use the 'Mark In' and 'Mark Out' buttons to move that footage onto the timeline. The 'Mark In' and 'Mark Out' buttons will be found below the 1st screen on your APP.
USING VIDEO AND AUDIO TRANSITIONS
To edit my video to make it look good and run smoothly, I have to use transitions. On APP there is an option which allows you to put in transitions onto your video's, below is how you put them onto your clips.

EXPORTING PROJECT TO CREATE A QUICKTIME MOVIE
To be able to export my video onto YouTube i firstly need to export the video from APP into a quicktime movie, to do this I followed the instructions below:

2. Next you will receive this new box which gives you various different options, it is best to leave everything alone apart from the video format, the default format setting is 'Quicktime' but you can change it to different formats depending on what you want to use the video for.
FINISHED VIDEO EDIT
Once I had exported the APP project to a quicktime movie this allowed me to be able to put my short video onto YouTube, below is the final edit I put together using various different filmed clips. I believe that the clips shows that I have a clear understanding on how to edit using Premiere Pro.
SETTING UP AN APP PROJECT
The first thing you need to do before you start editing is creating a project which will give you the basics in order to edit, I followed these steps in order to create a APP project:

1. Open Adobe Premiere Pro

2. Click on 'Create New Project'

3. You can change the location in which the project will be found in by changing the location drop down arrow, you can also name your project, once you are happy then you can continue.

4. You can also change the projects presets through this next stage, I do not need to so I will just continue

5. You have now finished creating a new project, you now have the tools to be able to start importing and editing video clips.
IMPORTING FILES TO APP
 To be able to start editing video clips you need to firstly import them onto your APP, to do this you have to go:
File > Import.. > Choose the video clips you wish to import.
CONSTRUCTING A PROJECT USING THROUGH THE USE OF 'MARK IN' AND 'MARK OUT' TO SELECT FOOTAGE
 To be able to select certain points of your footage which you need in your video, you will need to use the 'Mark In' and 'Mark Out' buttons to move that footage onto the timeline. The 'Mark In' and 'Mark Out' buttons will be found below the 1st screen on your APP.
USING VIDEO AND AUDIO TRANSITIONS
To edit my video to make it look good and run smoothly, I have to use transitions. On APP there is an option which allows you to put in transitions onto your video's, below is how you put them onto your clips.

1. Once on the APP menu you have the option in the bottom left hand corner to pick video transitions or music transitions, once you have found the transition you would like to use, simply drag it onto the timeline onto the clip you wish the transition to be on.
EXPORTING PROJECT TO CREATE A QUICKTIME MOVIE
To be able to export my video onto YouTube i firstly need to export the video from APP into a quicktime movie, to do this I followed the instructions below:

1. Once you are on the APP menu go to:
File > Export...

2. Next you will receive this new box which gives you various different options, it is best to leave everything alone apart from the video format, the default format setting is 'Quicktime' but you can change it to different formats depending on what you want to use the video for.
FINISHED VIDEO EDIT
Once I had exported the APP project to a quicktime movie this allowed me to be able to put my short video onto YouTube, below is the final edit I put together using various different filmed clips. I believe that the clips shows that I have a clear understanding on how to edit using Premiere Pro.
Planning: Feedback from treatment
 To be able to improve my treatment for my music video i believe that the best way in order to improve my ideas would be to get some constructive criticism from family, friends and others. i have set up a survey on surveymonkey.co.uk to collect the feedback from the people, to give my treatment some feedback click the following link:
Click here to take survey
Once I have received enough feedback I will create another post showing some of the results.
RESULTS 06/10/2013
Over the last week I have been conducting the following survey to help me understand what is good or what I can improve in my music video treatment, below are some of the responses which I have received:
"Good overall treatment however you did not go into depth about the location, it would be interesting to find out why you had chosen those locations"
"Listening the song you have chosen and reading the plot for your music video seems like it will go really well together"
"The plot sounds really cool and you've chosen a great song! the camera shots and movements you are planning to use sound like they will be good."
"An interesting treatment however you should go into more information on mis-en-scene and locations however overall not a bad start."
"Watching your treatment back it sounds like it will be a great music video, I will definitely watch it once it is completed :)"
"Not bad, more info on location though."
My personal favorite:
"watched it and thought you know what this is okay but come on man what is this song in the background. It was a nice jazzy beat that made me move my feet but i didnt want to dance so"
I will now use this information to now plan my next steps on creating my video. I will also specifically go into more depth about the location in a future post which will help others to understand the concept of the music video a little more.
Planning: Music video treatment
Below is my attempt at writing a music video treatment for my coursework, I have chosen to use the software PowToon to make my treatment more interactive. I hope you enjoy.
Research: 60 second pitch for music video
Script: "Hello, today I'm here to pitch my idea for a music video for Fenech-Solers new single 'Magnetic'. After analysing the songs lyrics, I found out that the song is about the main characters ambition to travel the world however can't because he's in some sort of plateau. My idea is for the video to match the meaning of the lyrics, I will do this by creating a short story which follows the main characters desire to travel, he will change locations through various different camera techniques, however when he finally arrives at his destination, he wakes up to find out that acheiving his ambition was just a dream. I have chosen this idea because I believe it would be reasonably straight forward to film because the locations I have chosen to film in are available and also I would only need 1 actor, this gives me the flexibility to film when me and the actor choose to.
Independent Research: Fenech-Soler's new album 'Rituals' has been released
Listen to the full album below..
Independent Research: Looking back at Fenech-Soler's previous music videos!
To get an idea of what sort of visuals may fit Fenech-Soler's type of music I spent some time looking back at some of their previous music videos, below I will give my opinion on some of them...
The music video itself doesn't hold a story and has no connection to the lyrics at all, the video in a nutshell is full of vibrant colours which makes the video stand out, the band are playing their song and whilst the song becomes more upbeat, the more colours come into shot. If I was to choose one thing to implant into my music video from this video is the use of colours, they attract the viewer and make the music video more upbeat.
This video is very quirky and I honestly haven't got a clue what is actually happening, I can see that a trend is beginning to form that the band like to create music videos which don't actually have any meaning to them apart from showing that they like to experiment and have fun whilst creating them. Apart from that I like the speed the camera changes when the song quickens, it gives the music video a sense of something important might happen which makes the viewer watch.
Independent Research: FENECH-SOLER release album tracklist for new album!
The tracklist for Fenech-Soler's new album 'RITUALS' has been released 4 days prior to the album release, their upcoming album is the album I have chosen to use for my A2 music video, the track I have chosen from Rituals is 'Magnetic', below is the tracklist which has been leaked online:
1. Youth
 2. All I Know
3. In Our Blood
4. Ritual I
5. Last Forever
6. Somebody
7. Fading
8. Magnetic
9. Maiyu
10.Two Cities
11.Ritual II
12 Glow
13. Somebody (White Version)
14. Two Cities (White Version)
15. Last Forever (Live at Electric Ballroom)
16. All I Know (Live Electric Ballroom)
1. Youth
3. In Our Blood
4. Ritual I
5. Last Forever
6. Somebody
7. Fading
8. Magnetic
9. Maiyu
10.Two Cities
11.Ritual II
12 Glow
13. Somebody (White Version)
14. Two Cities (White Version)
15. Last Forever (Live at Electric Ballroom)
16. All I Know (Live Electric Ballroom)
Research: Chosen Song Lyrics Analysis - FENECH-SOLER//MAGNETIC
We're standing on a fault line
Caught in-between two minds
Exhale this city filling up our lungs
Let the light dust settle
This person is describing how he is trapped between a decision which is making his relationship with somebody 'faulty' also the line 'exhale this city filling up our lungs' gives me the image that he is looking at some city landscape, exhaling the view he's seeing.
When we're through with this place
The past will be erased
Counting down the hours
Synchronize 'til we take control
The person speaking I believe is now speaking to somebody directly, the line 'The past will be erased, Counting down the hours' makes me believe the person is talking directly to a girl and he is trying to pusuade her to forgot something,
It's a feeling
In the great unknown we can burn it out
Cause I needed
To show you
There's a world outside that we've never seen
Can you feel it too?
Can you feel it too?
In a world where nothing feels real
Can you feel me too?
Woah woah
The previous lines about how there is a city mentioned and how the person is counting down the hours sort of makes sense after reading the chorus, he basically wants to take this girl somewhere breathtaking and wants her to understand the 'meaning of life'.
I'm pulling hours out from under our armor
Follow the river down to the sea
Rising up gonna come back stronger
We keep on running through these empty streets
The person who i can now distinguish as a man, is describing again what he is seeing, however the river may be a metaphor for something else, I don't really know what but a guess could be that the river could be symbolising his emotions being let free into the 'sea'.
It's a feeling
In the great unknown we can burn it out
Cause I needed
To show you
There's a world outside that we've never seen
Can you feel it too?
In a world where nothing feels real
Can you feel me too?
Woah woah
(as previous)
When the night's magnetic, we'll run
When the night's magnetic, they'll come
When the night's magnetic, we'll run
When the night's magnetic, they'll run
When the night's magnetic, they'll run
When the night's magnetic, we'll run
The use of repetition and the use of the words 'run' repeated makes me think of the man and women running away, this is also backed up by the way it says 'we'll run' and they'll come' meaning people might be looking for them.
Can you feel it too?
Can you feel it too?
In a world where nothing feels real
Can you feel me too?
Woah woah
Overall i believe that the lyrics symbolise a relationship gone wrong between the narrator (man) and a girl, the man wants to show the girl what she's missing out on by taking her to see breathtaking views and just in general taking in 'life', something goes wrong in the end as by the second from last paragraph the use of repetition suggest that the pair are running away and running away from someone, the last paragraph sums up their journey and how the world 'doesn't look real anymore' suggesting there relationship could be over.
Research: Chosen Bands Website & Twitter Feed
OFFICIAL FENECH-SOLER TWITTER FEED
Their twitter feed will keep me updated with any band information which could become necessary for my coursework in the future..
Tweets by @FENECHSOLER
OFFICIAL WEBSITE
http://www.fenechsoler.co.uk/

Their twitter feed will keep me updated with any band information which could become necessary for my coursework in the future..
Tweets by @FENECHSOLER
OFFICIAL WEBSITE
http://www.fenechsoler.co.uk/

Research: Soundcloud for Fenech-Soler
I have implemented my chosen bands Soundcloud account onto my blog so it makes it easier to access some of the music which will help me when I start to evaluate the lyrics of the songs etc.
Audience Research: Demographics and Psychographics
Demographics:

Demographics is the statistical data relating to the population and particular groups which are involved within the population. Things such as age, race, gender, nationality, income and schooling all relate to being demographic information. An example would be the band 'One Direction' having an audience age of around 10-20 years old and the audience would be mostly all girls.
Psychographics:
 Psychographics isn't at all like demographic, instead of statistical numbers, Psychographics is the study and classification of people according to their attitudes, aspirations and other psychological information to do with the audience. An example of psychographic information would be how and why a typical audience buy a certain album, this information would then help the band create new idea's to promote their album.

Demographics is the statistical data relating to the population and particular groups which are involved within the population. Things such as age, race, gender, nationality, income and schooling all relate to being demographic information. An example would be the band 'One Direction' having an audience age of around 10-20 years old and the audience would be mostly all girls.
Psychographics:

Research: In-depth analysis of 'Coffee & TV' by Blur
Name of artist: Blur
Title of song: Coffee & tv
Released: 28th June 1998
Producer: William Orbit
Genre: Indie-Rock
Relationship between visuals and lyrics?
I believe that the visuals illustrate a story about a boy which has dissapeared and the worried parents have no way have finding the boy, however an animated milk carton comes to life, and with a advertisement label with the boys face on, goes on search for the boy and also to find romance. The lyrics do match the visuals as the visuals talk about the stress the boy has been put through and give hints to why he might of run away, for example
"I've seen so much, I'm goin' blind
And i'm braindead virtually
sociability
It's hard enough for me
Take me away from the big bad world"
The lyrics match the visuals as both the lyrics and the animated milk carton are following the same adventure, the milk is a representation of the missing boy and wants to find romance and get away from his home.
Relationship between the visuals and the speed of the music:
The song as a whole is a quite upbeat sounding song, however there are some parts of the song which almost fall to a silence, the visuals match the slowing down of the music video because as it start to slow down, an event would happen in the visuals, for example at the end of the song when the music starts to slow down, the visuals show the milk carton getting drank and getting threw out, I believe the producer has done this because we relate slow, quiet music with being depressed or sad so when an event such as the milk cartons death occurs, the music would slow down because of it wants to represent the feelings shown in the music video and also by the viewer.
The importance of the artist in the visuals?
The producer of the music video chosen to add a clip of Blur playing towards the end of the music to help represent them as individuals and so that the audience understand how many members are in the group and what they look like etc, also it could be the other way round, for example if the audience was watching the music video and didn't know who it was by although they knew who Blur were, allowing the audience see the band at the end of the music video allows them to understand that this music video was by Blur.
Use of Voyeurism?
There is no use of Voyeurism in this music video, presumably because the main character is a milk carton!
Any use of intertextuality?
I believe that the music video could be influenced by some sort of animation back in 1998, as the rise of animation on real life started to become much more popular in the late 90's, the producer may of chosen to use the animation to grab out to this growing population of animation to attract more interest.
What is the mixture between performance and narrative?
The music video is almost a whole narrative using visuals and the lyrics which builds a solid storyline which builds the story for the viewer to follow, the use of the performance by the band only lasts for around 20-30 seconds so it is a small minority compared to the narrative side of the video.
Research: Andrew Goodwin's 6 Features of Music Videos
Andrew Goodwin released a book called 'Dancing In The Distractions Factory' which features a theory suggesting which features and characteristics that can be found in music videos:
These are:
 1. Music videos demonstrate genre characteristics.
(e.g. stage performance in metal videos, dance routine for boy/girl band, aspiration in Hip Hop).
2. There is a relationship between lyrics and visuals. The lyrics are represented with images.
(either illustrative, amplifying, contradicting).
3. There is a relationship between music and visuals. The tone and atmosphere of the visual reflects that of the music.
(either illustrative, amplifying, contradicting).
4. The demands of the record label will include the need for lots of close ups of the artist and the artist may develop motifs which recur across their work (a visual style).
5. There is frequently reference to notion of looking (screens within screens, mirrors, stages, etc) and particularly voyeuristic treatment of the female body.
6. There are often intertextual reference (to films, tv programmes, other music videos etc).
EXTENSION: MY VIEW ON DANCING IN THE DISTRACTION FACTORY
Reading parts of Andrew Goodwin's book 'Dancing In The Distraction Factory' has helped me realise the different stages of what makes a music video. Although some music video's do not follow the attributes created by Goodwin, most of the music video's I have watched do involve most of the 6 rules which apparently make a music video. I believe that those 6 rules really do help make a music video a music video and not a short film, a short film obviously follows a plot and a script however a music video uses lyrics, empathetic sound and a storyline to make an interesting video and also so it can match the music side of the video.
I will now go through the 6 rules and analyse each of them and give some of my own personal examples...
1. Music videos demonstrate genre characteristics.
(e.g. stage performance in metal videos, dance routine for boy/girl band, aspiration in Hip Hop).
The reason I believe that most music video's follow certain characteristics is because they want to attract an audience from that particular genre, for example if a band were making a music video for their rock-genre song, they would use such characteristics like blood, gore and just general crazy doings to show the audience what type of genre the band is and hopefully the audience would become interested.
2. There is a relationship between lyrics and visuals. The lyrics are represented with images.
(either illustrative, amplifying, contradicting).
Some music video's make sure that their lyrics are represented with images and actions, however other's don't. I believe that directors make sure that the visuals link in the lyrics so that the audience will be able to understand the lyrics more clearly, for example if there wasn't visuals to match the lyrics then some of the audience may not follow the lyrics as properly. Other directors choose not to link their visuals with the lyrics because they want to tell another story to try and reach out to the audience and make them interested in watching the music video.
3. There is a relationship between music and visuals. The tone and atmosphere of the visual reflects that of the music.
(either illustrative, amplifying, contradicting).
Directors choose to make the visuals reflect the mood and atmosphere within the lyrics as it helps makes the music video link in with the lyrics well and the final product would look good. if the visuals didn't reflect the atmosphere of the lyrics, for example if the lyrics were quite depressing and the visuals were upbeat, then it wouldn't look good at all, however if the lyrics were depressing and the visuals were also telling a depressing story then it would make much more sense to the audience.
4. The demands of the record label will include the need for lots of close ups of the artist and the artist may develop motifs which recur across their work (a visual style).
The use of close-ups and frequent shots of the artist help the audience understand who is the artist and what they look like, it also helps develop motifs within the artist, for example if in the music video the artist was wearing some sort of stand-out items of clothing the directors may choose to keep showing the artist to help build up a motive of the artist wearing out-going clothing which can be used in other music video's which can help with stuff such as popularity and sales in that piece of clothing etc.
5. There is frequently reference to notion of looking (screens within screens, mirrors, stages, etc) and particularly voyeuristic treatment of the female body.
Directors in their work always look for ways to make their piece of work stand out to different people, the use of Voyeurism is a very common way of gaining more interest from a male perspective, for example if in the music video there were women who were acting in a seducing fashion then men would want to watch it, therefore gaining more interest in the music video and the artist.
6. There are often intertextual reference (to films, tv programmes, other music videos etc).
Directors would try and link their music video's into other media references such as tv programmes or other music video's to try and spark more interest in their music video, for example if a music video linked their visuals with a popular tv show then the music video would gain interest from anyone who was interested in that particular tv show.
Subscribe to:
Posts (Atom)