Planning: Shot list

In order to make sure that filming is followed by previous construction, I have put together a shot list for all the different shots I will be using throughout the music video. I have also added a key to remind me of all the possible shots I am able to use.

Key:

Establishing shot - ES
Close up shot

Mid shot - MS
Over the shoulder - OTS
Close up - CU
Two Shot - TS
Extreme close up - ECU
Long Shot - LS
Noddy shot - NS
Cut-in shot - CiS
Cut-out shot - CoS

(reverse) - clip will be reversed when edited.


Long shot


Shot 1: ECU of face. (reversed)
Shot 2: MS of face and shoulders (reversed)
Shot 3: LS of character standing up. (reversed)
Shot 4: CiS of characters footsteps. (reversed)
Shot 5: CU of character dropping object (reversed)
Shot 6: MS of character walking away (reversed)
Shot 7: MS of character walking out of door (reversed)
Shot 8: ECU of face
Shot 9: MS of face and shoulders

Shot 10: LS of character standing up
Shot 11: CU of characters smiling
Shot 12: CoS of  blackness/character now in the forest
Shot 13: MS of character looking around
Extreme long shot
Shot 14: CoS character now running around surprised
Character miming
Shot 15: MS of character attempting to climb tree
Character miming
Shot 16: LS of character running again
Character miming
Shot 17: MS of character out of breath
Shot 18: POV of character looking at hands
Shot 19: MS of character smiling
Shot 20: CoS of character using hands to swipe camera, moves to another field.
Extreme close up shot
Shot 21: ELS of character standing in open field
Shot 22: CU of character looking at hands
Shot 23: CoS of character running happily
Shot 24: MS as character stops still, swipes hands accross camera
Shot 25: CoS of character changing location to street
Character miming
Shot 26: LS of character standing in the middle of the street
Shot 27: CoS of character changing location back to orginal forest
Shot 28: MS of character standing confused
Shot 29: CU side of characters face
Shot 30: LS character sitting down
Shot 31: LS character walking around
Shot 32: CoS Swipes camera again, another location
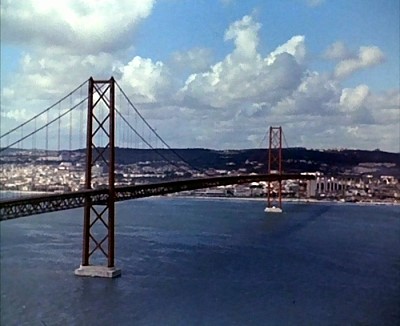
Establishing shot
Shot 33: Character plays around
Character miming
Shot 34: Character swipes camera back to original location
Shot 35: MS of character staring into camera
Shot 36: LS of character walking back to opening scene
Shot 37: ELS of character lying back down on the ground
Shot 38: ECU of characters face whilst lying down
Shot 39: Fading into darkness

Planning: Equipment planning

To make my music video look as professional as possible, I will need to be equipped with some great tech in order to pull it off. Below are some of the equipment I have planned to use for my music video:

HD Quality camera 

I have planned to use a good quality camera to film my music video, however I have not specifically chosen chose the model of the HD camera yet. I need the camera to be a top quality model so that I can get some great shots which make the music video look less of a home movie and more of a professional music video, I hope that the camera gives me crisp looking shots and other factors such as focus and exposure lock.

Below are some camera's which will give me quality results:

- Panasonic HC-V700
- Canon Vixia HF R300
- Panasonic HC-V720
- JVC Everio GZ-VX815
- Canon Legria HF R48
- Canon XA10

CHOSEN CAMERA

The camera I have chosen to use is a Nikon D3200, this is due to a range of factors, for example the camera can be accessed from the media department of my school. It is also a good quality camera as i have watched previous quality tests of the  camera. Below is me experimenting with the D3200…


I experimented with the depth of field of the camera. For example in this picture you can see that you person is in focus whilst the background is slightly blurred out. This shot shows the quality that the camera works at.


Again this shows the different qualities of the depth of field, it also shows the quality of shots the camera is able to produce. This makes me confident that when i come to taking pictures for my digipack, i will get some really good clips.


This was my first time using the Nikon to film, although it doesn't look great it was because I was just playing around with the different effects, I am hopeful that the quality of the camera will give me the best results when filming my music video.


Steadicam


A steadicam is a piece of equipment which uses physics to balance out the proportions of the camera so that when filming, the camera doesn't shake and cause bad footage. The reason I want to use a steadicam is quite simple really, it will give me great, professional shots and prevents the camera from shaking when I'm walking/moving the camera. I am able to borrow this piece of equipment from the media department which gives me an advantage as I won't have to look into renting one.


Tripod


Again a tripod is another piece of equipment which is incredibly important to enhance the quality of my filming, this is because it prevents the cameraman from holding the camera all the time which could cause the image to shake, instead the tripod allows the camera to sit on top of it and gives you the opportunity to move it sideways, upwards and downwards. I am able to borrow this from the media department meaning I don't need to look to rent one out. I have also had previous experience with using a tripod so I know how to use it efficiently.


Planning: Casting for music video

To be able to make sure that i get the best grades for my music video, not only do i have to plan all the different camera aspects such as shots and movements, I have to make sure that I have a good casting which will guide my music video to a higher grade. If i didn't have a good cast then my music video will look poor quality and roughly planned so planning who will screen in my music video is incredibly important.

I have lined up 3 different characters which will battle for the place in acting in my music video. Below are the 3 individuals I have planned to contend to play the only part in my music video.

Jordan Bignell

I have had previous experience with working with Jordan from last years coursework piece where i had  to make a horror intro. Through this work i had understood that Jordan is able to sufficiently act and show emotion and expression which was needed. I have chosen Jordan for my music video because of these attributes and we also are friends meaning communicating and working with each other will be much easier.

Deet Bains

Again, myself and Deet were partners in last years media coursework where we spent every lesson working with each other planning our horror film intro. i know that Deet is keen in acting and the different aspects of media studies so I had asked him whether he was eligible to act and he had agreed. Deet however doesn't have any acting experience meaning I may have to consider whether he'll play the character.

Taylor Wilson

Taylor currently studies A Level Drama which could be a bonus to my music video. Taylor is the only act out of the 3 chosen that actually study Drama which makes him stand out from over the rest. However I have not yet been able to work with Taylor and I understand that some days he may find difficult to be able to film.

Final verdict

The character I have chosen to cast in my music video is Jordan Bignell. What made him stand out from the rest was our experience with working with each other, because of this bond, I understand his strengths and weaknesses which will make it much easier to film. I also understand his ability in acting and I'm sure that this can only benefit my music video grade.